

How do you install a pump mechanical seal correctly?
Hey there! As a supplier of Pump Seal Types, I've seen firsthand how crucial it is to install a pump mechanical seal correctly. A proper installation not only ensures the smooth operation of your pump but also extends the lifespan of the seal itself. In this blog, I'll walk you through the steps to install a pump mechanical seal correctly, and I'll also mention some of the seal types we offer.
Step 1: Gather Your Tools and Materials
Before you start the installation process, make sure you have all the necessary tools and materials. You'll typically need a set of wrenches, a torque wrench, a seal installation tool, cleaning solvents, and of course, the mechanical seal itself. Here at our company, we offer a wide range of seal types, including the Din 24960, Eagle Burgmann Seal, and Fluiten Mechanical Seal. These seals are designed to meet different pump requirements, so choose the one that's right for your application.
Step 2: Prepare the Pump
The first thing you need to do is to shut down the pump and disconnect it from the power source. This is a safety measure to prevent any accidents during the installation process. Once the pump is off, drain the fluid from the pump casing. You can do this by opening the drain valve or using a siphon.
Next, clean the pump shaft and the seal chamber thoroughly. Any dirt, debris, or old seal material left in these areas can cause problems with the new seal installation. Use a cleaning solvent and a lint-free cloth to wipe down the surfaces. Make sure they are completely dry before proceeding.
Step 3: Inspect the New Seal
Before you install the new seal, take a close look at it. Check for any visible damage, such as cracks, chips, or scratches. Also, make sure that the seal dimensions match the specifications of your pump. If you notice any issues with the seal, contact us right away. As a reliable supplier, we stand behind the quality of our products and will work with you to resolve any problems.
Step 4: Lubricate the Seal
Lubrication is key to a successful seal installation. Apply a thin layer of compatible lubricant to the sealing faces and the O-rings of the mechanical seal. This will help the seal slide into place easily and also prevent damage to the sealing surfaces during installation. Make sure to use a lubricant that is suitable for the type of fluid your pump will be handling.

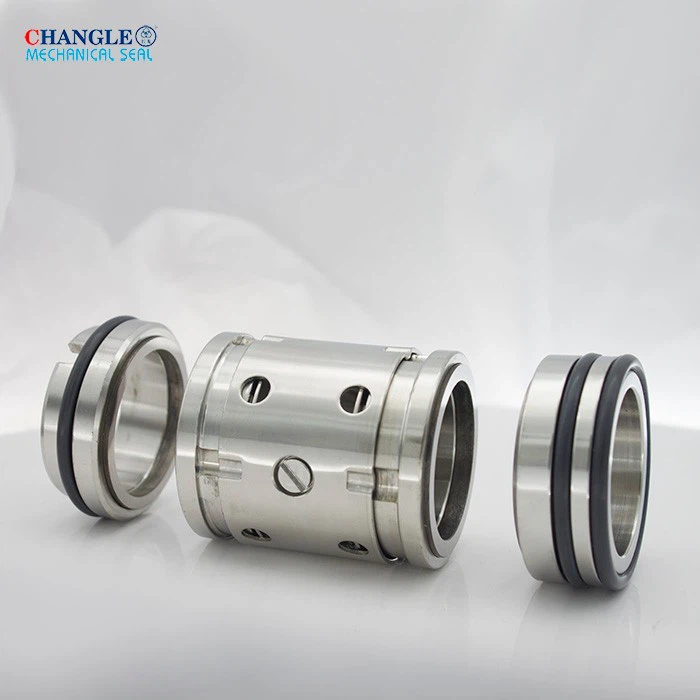
Step 5: Install the Seal
Now it's time to install the seal. Carefully place the seal onto the pump shaft, aligning it with the seal chamber. Use a seal installation tool if necessary to ensure that the seal is installed evenly and without any misalignment. Be gentle during this process to avoid damaging the seal.
Once the seal is in place, use a torque wrench to tighten the gland bolts to the specified torque value. Over-tightening can cause the seal to deform, while under-tightening can lead to leakage. Refer to the manufacturer's instructions for the correct torque values.
Step 6: Reassemble the Pump
After the seal is installed, reassemble the pump. Make sure all the components are properly aligned and tightened. Reconnect the power source and fill the pump casing with fluid.
Step 7: Test the Pump
Before putting the pump back into full operation, it's important to test it. Start the pump and check for any signs of leakage around the seal area. If you notice any leaks, shut down the pump immediately and check the installation. It could be that the seal is not installed correctly or there is a problem with the seal itself.
Tips for a Successful Installation
- Follow the Manufacturer's Instructions: Every mechanical seal is different, so it's important to follow the manufacturer's installation instructions carefully. These instructions will provide you with specific details about the installation process, including torque values, lubrication requirements, and alignment procedures.
- Take Your Time: Rushing through the installation process can lead to mistakes. Take your time to ensure that each step is done correctly. This will save you time and money in the long run by preventing seal failures and pump downtime.
- Keep Records: It's a good idea to keep records of the seal installation, including the date of installation, the type of seal used, and any maintenance or troubleshooting procedures. This information can be useful for future reference and can help you identify any patterns or issues with your pump seals.
Why Choose Our Pump Seal Types?
As a supplier of Pump Seal Types, we understand the importance of providing high-quality products and excellent customer service. Our seals are made from top-grade materials and are designed to withstand the toughest operating conditions. Whether you need a Din 24960, Eagle Burgmann Seal, or Fluiten Mechanical Seal, we have the right solution for you.
If you're in the market for pump seals or have any questions about the installation process, don't hesitate to contact us. We're here to help you find the best seal for your application and ensure that you get the most out of your pump.
Conclusion
Installing a pump mechanical seal correctly is a critical step in maintaining the performance and reliability of your pump. By following the steps outlined in this blog and choosing the right seal for your application, you can ensure a successful installation and avoid costly downtime. If you need any assistance with your pump seal installation or have questions about our products, feel free to reach out to us. We look forward to working with you!
References
- Manufacturer's installation guides for mechanical seals
- Industry best practices for pump seal installation